
reptilog
Frontend and backend for Reptilog (GitHub app) that automatically updates a website with AI-generated user-friendly changelogs based on PRs to production branches.
Repository Info
About This Server
Frontend and backend for Reptilog (GitHub app) that automatically updates a website with AI-generated user-friendly changelogs based on PRs to production branches.
Model Context Protocol (MCP) - This server can be integrated with AI applications to provide additional context and capabilities, enabling enhanced AI interactions and functionality.
Documentation
Reptilog
![]()
An AI-powered changelog inspired by Greptile. Built with Probot and OpenAI for the backend, Next.js with the App Router, Lowdb for data storage, Tailwind CSS for styling, Framer Motion for animations, and Lucide for icons.
- After merging a PR to your production branch, Reptilog uses LLMs to translate the data associated with all the commits of that PR (including commit message, changes per file, etc.) into a user friendly changelog.
Demo
- Updated UI/UX--Markdown support within changelog entries:
How does it work?
Reptilog is composed of a GitHub bot and a frontend user-facing website. The GitHub bot code is within reptilog-backend, and the website code is within reptilog-frontend.
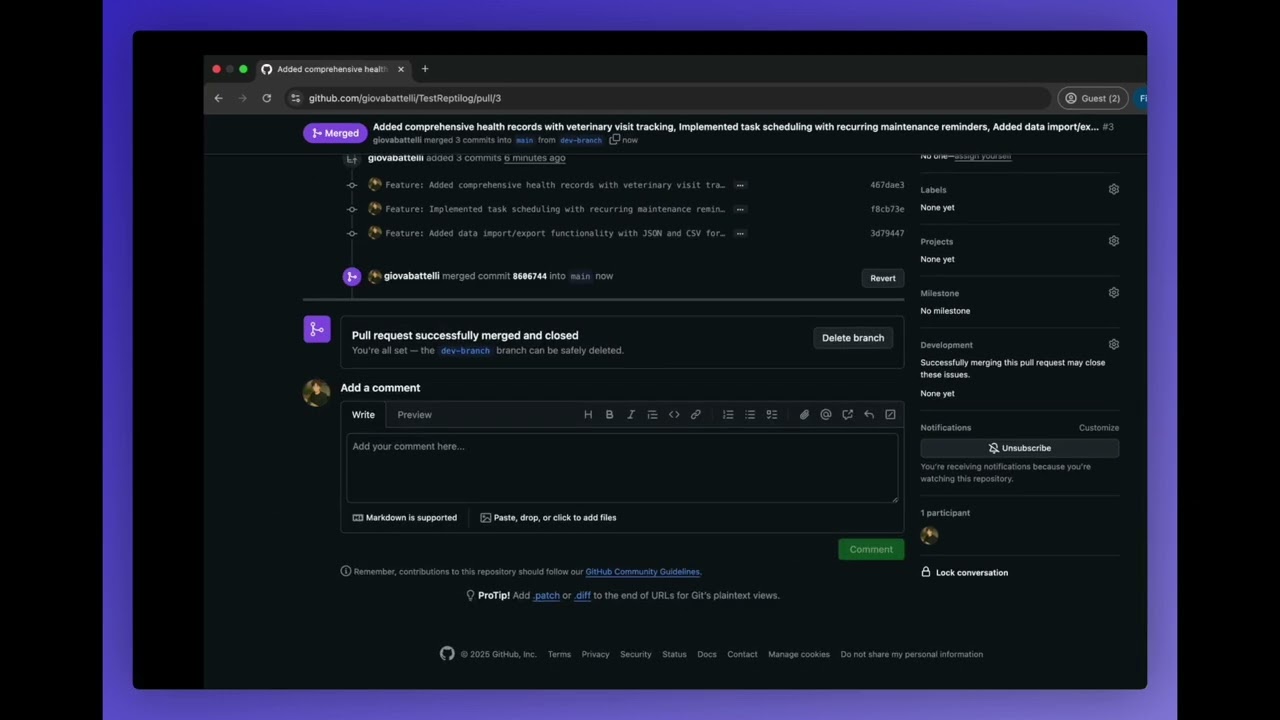
With the GitHub bot installed onto your GitHub repository (or repositories) of choice and both the frontend and backend running (see the "Get Started" section below for more information), you can create a PR to a main/master branch, and the bot is activated once your PR is merged (via the pull_request.closed GitHub webhook). The bot then fetches the appropriate commits corresponding to that pull request and sends all the information within the commits (including commit messages, file diffs, etc.) to an OpenAI LLM. Via some clever prompting, the LLM constructs a user-friendly changelog using all the commits it was given. The LLM then returns a properly structures JSON object containing a markdown-formatted changelog title and description for that PR. The JSON message is subsequently sent from the GitHub bot to the frontend via a POST request to the frontend. Upon receiving this POST request, the user-facing website then writes to its JSON database with the new changelog and its metadata (date, PR #, etc).
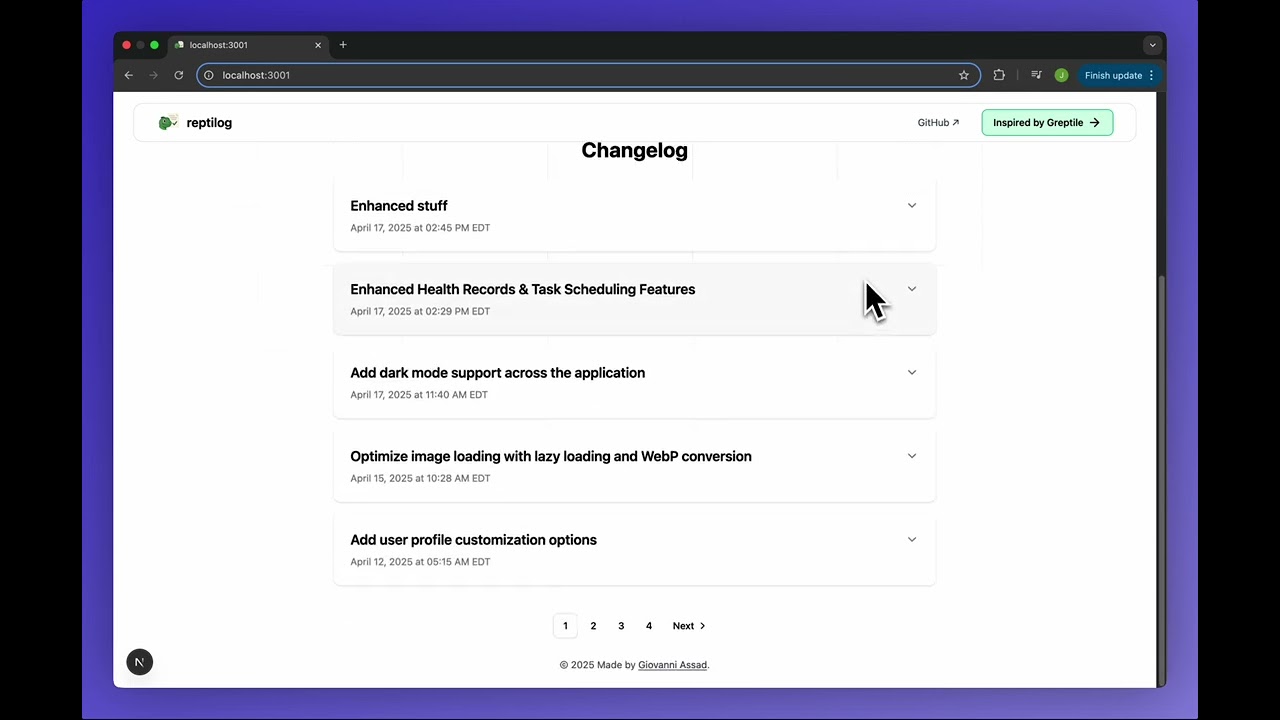
The developer doesn't need to worry about a thing. All they need to do is create the PR, and the changelog is automatically generated within less than a minute. Upon refresh, the website fetches the latest changelogs stored within the database, sorted from newest to oldest, and in paginated format.
Get Started
-
Clone the repository.
-
Download dependencies for both portions (
npm ifrom thereptilog-frontendandreptilog-backenddirectories). -
Create a GitHub bot on your GitHub account and install it onto a repository of your choice. Make sure the permissions shown in the images below are selected for your GitHub bot. In order to link your GitHub bot to your locally-cloned repository, make sure to take a look at
./reptilog-backend/.env.example. You can find most of the.envvariables within the main page of your GitHub bot settings. For more information on connecting the bot, read this from Probot's docs. You will need an OpenAI key as well. Also, make sure to set up your.envfile within thereptilog-frontend. Check the./reptilog-frontend/.env.example.


-
Run
npm run devfrom thereptilog-frontenddirectory. Then open a new terminal window and runnpm run buildfollowed bynpm startfrom thereptilog-backenddirectory. The frontend will run on localhost with port 3001, and the backend will run on localhost with port 3000. -
Create a pull request to a production branch (main/master) of the repository with the GitHub bot installed. Make sure the frontend and backend are running. Merge that opened PR. If everything is set up correctly and you refresh the page of your frontend (localhost:3001), your latest changelog will display at the top of the first page of changelogs.
Design Choices
Developer-facing design choices
A big decision for me was how and when to create a changelog entry. Initially, I wanted to make it such that a developer could create a GitHub issue with a special tag, which would summon the reptilog and create the changelog for all of the commits between the most recent commit and the last changelog. I eventually settled on having the GitHub bot automatically create a changelog based on the commits of a pull request to a main/master branch.
A lot of companies operate with a "main development" branch, to which everyone merges their own branch changes onto. When an official release is made, a pull request is created from the "main development" branch to the main/master branch, in order to make things available to the users of the product. This is a clean and efficient solution that allows for very clear boundaries of a product's versioning. Conveniently, these pull requests to a production branch create a nice partitioning that works well for changelogs too. In the context of a customer-facing API: when would you need to deploy to your production branch without notifying your users of incoming changes? For the most part I think the answer to that question is "never". Thus, I think it was the better route to take, as supposed to the arbitrary nature of creating a changelog at any random time via the human creation of a GitHub issue with a specific tag.
Public-facing design choices
For the public, I focused on a Greptile-inspired design. I imitated Greptile's beautiful and simple navbar, along with the grid pattern on their landing page. I also made sure to get the highlighting of the various links on the navbar right, and ensured the highlighting was the same color for every single link on the page. For the changelog entries, I went for a bit of a different approach; I used a dropdown-style changelog, where users can click on the dropdown to display the details of a specific changelog entry. Overall, the ui of the frontend makes for a simple and straightforward user experience.
AI Tools used
For development I use Cursor and Anthropic's Claude-3.7-sonnet; Cursor was immensely useful when I needed help going through documentation, for writing boring boilerplate code, and solving annoying linter issues. I normally use MCPs to work with frontend code, but this time I didn't need to use any MCPs (I usually like to use the MagicUI MCP when dealing with MagicUI components).
License
ISC © 2025 Giovanni Assad
Quick Start
Clone the repository
git clone https://github.com/giovabattelli/reptilogInstall dependencies
cd reptilog
npm installFollow the documentation
Check the repository's README.md file for specific installation and usage instructions.
Repository Details
Recommended MCP Servers
Discord MCP
Enable AI assistants to seamlessly interact with Discord servers, channels, and messages.
Knit MCP
Connect AI agents to 200+ SaaS applications and automate workflows.
Apify MCP Server
Deploy and interact with Apify actors for web scraping and data extraction.
BrowserStack MCP
BrowserStack MCP Server for automated testing across multiple browsers.
Zapier MCP
A Zapier server that provides automation capabilities for various apps.